
podcast AI & ML
Generative AI in the Real World: Faye Zhang on Using AI to Improve Discovery

article AI & ML
Prompt Engineering Is Requirements Engineering
We’ve Been Here Before

article AI & ML
MCP in Practice
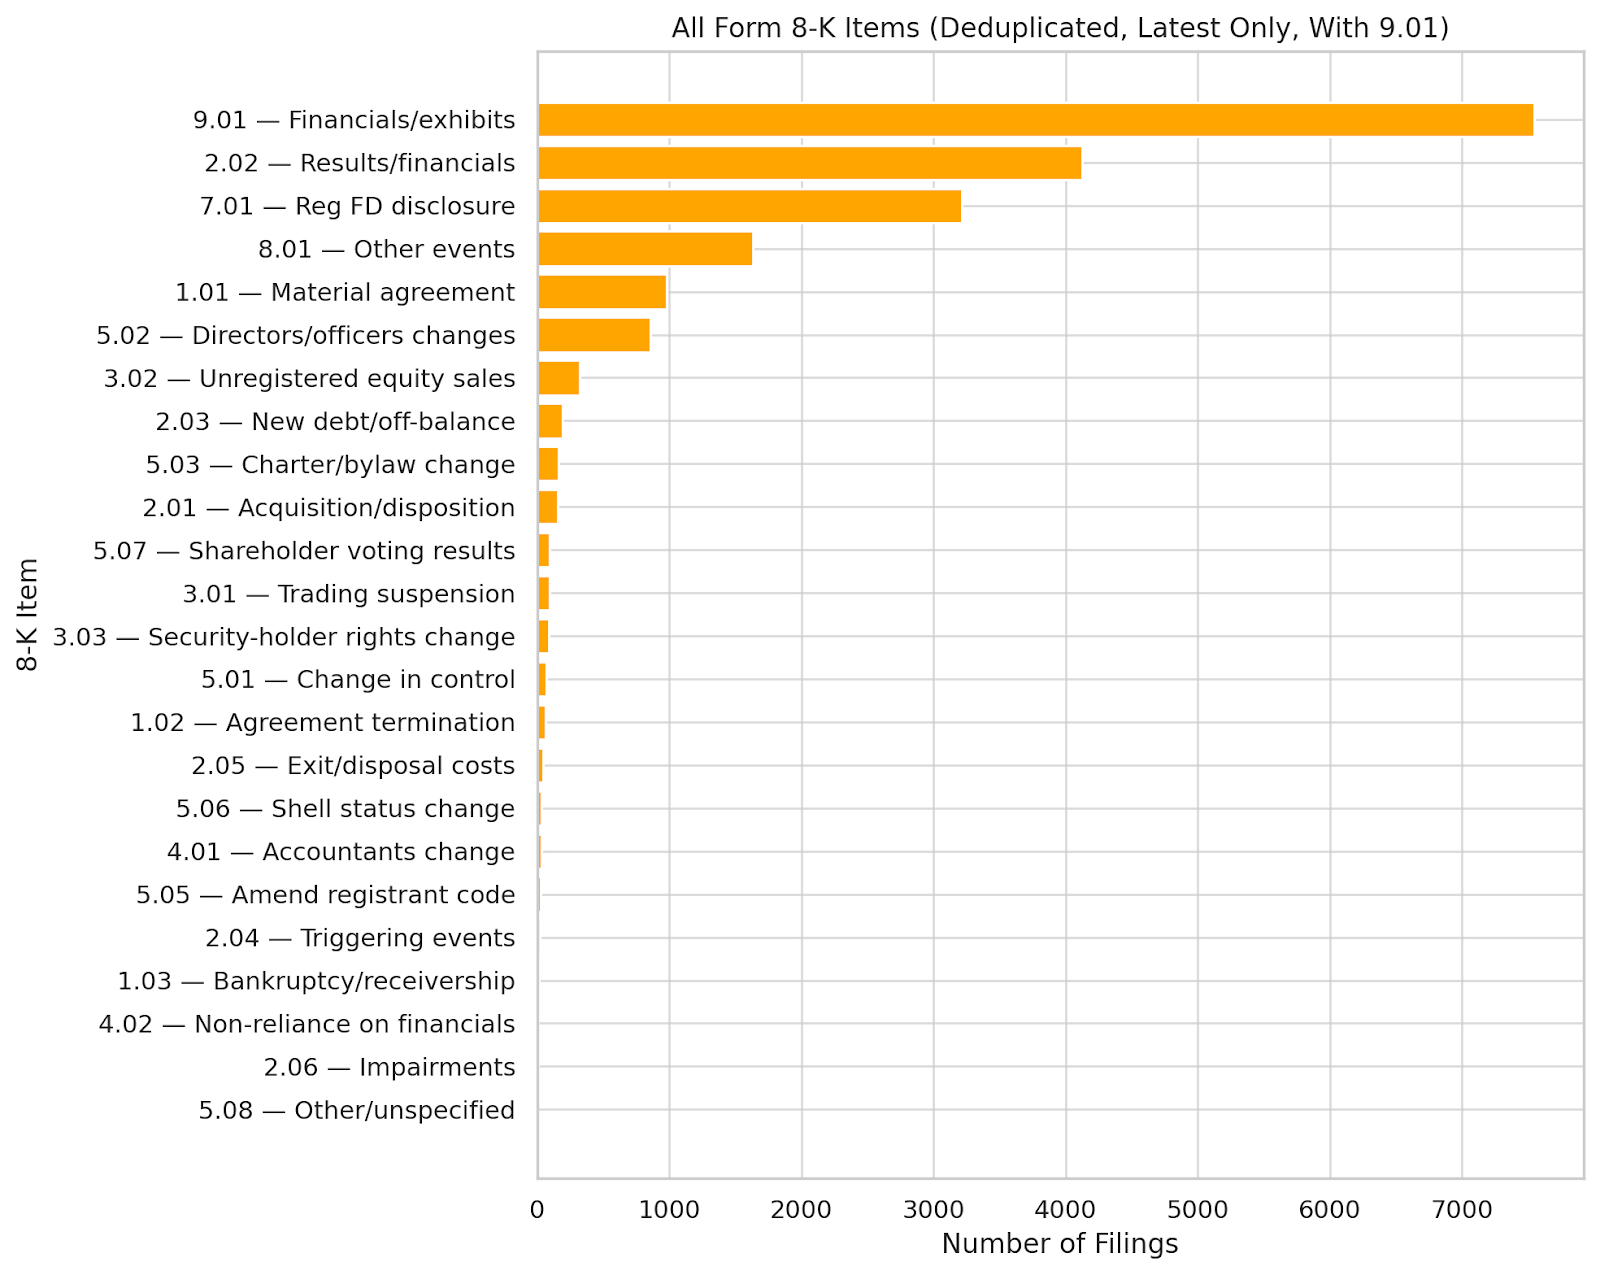
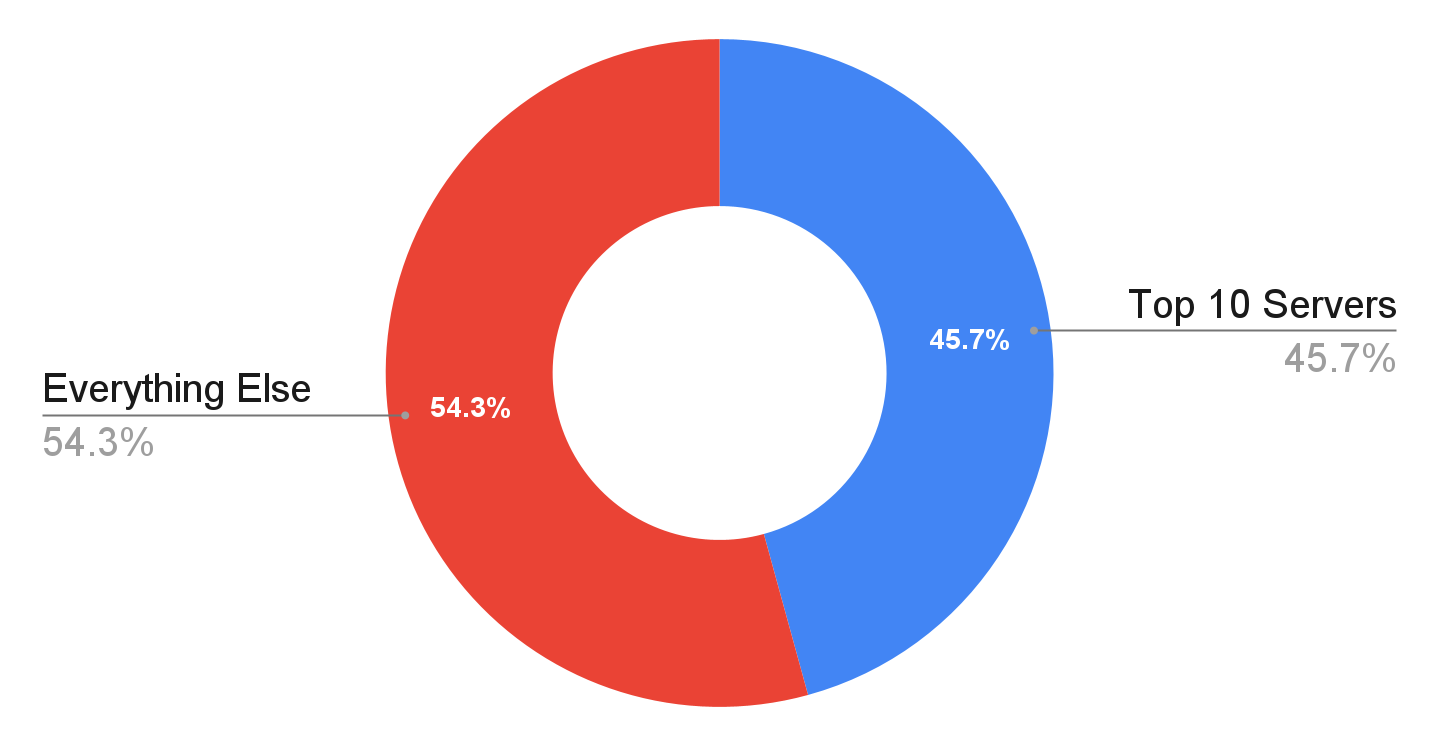
Mapping Power, Concentration, and Usage in the Emerging AI Developer Ecosystem
article
Quality over Quantity
video
Introduction to MCP with Lucas Soares—Key Moments from AI Superstream: AI Agents

article
When AI Writes Code, Who Secures It?
article
Read, Write, Act: Inside the MCP server boom

article
Taming Chaos with Antifragile GenAI Architecture

article
Building AI-Resistant Technical Debt

article
Megawatts and Gigawatts of AI
video
Highlights from AI Superstream: AI Agents and the Future of Software Development

article
A “Beam Versus Dataflow” Conversation

podcast
Generative AI in the Real World: Luke Wroblewski on When Databases Talk Agent-Speak
0:00
/
0:00

article
AI Security Takes Center Stage at Black Hat USA 2025

article
Looking Forward to AI Codecon

article
Understanding the Rehash Loop

video
How AI Agents Are Reviving the Programmable Web with Angie Jones—Key Moments from AI Codecon

article
Radar Trends to Watch: September 2025
video